
Microsoft Copilot Studio: Creating Your First Copilot
With the evolution of Power Virtual Agents into Microsoft Copilot Studio, a new era of generative AI integration in customer engagement tools is ushered in. Microsoft Copilot Studio is a powerful tool that empowers teams to create copilots quickly and easily, without the need for data scientists or developers. With its guided, no-code graphical experience and enhanced integrations across Microsoft Copilot, it’s now easier than ever to create a copilot that meets your needs.
Before we begin, it’s important to note that Power Virtual Agents capabilities and features are now part of Microsoft Copilot Studio. As a result, some articles and screenshots may still refer to Power Virtual Agents while documentation and training content is being updated.
Getting Started with Microsoft Copilot Studio
To get started with Microsoft Copilot Studio, you’ll first need to learn more about its capabilities and features. You can do this by visiting the Microsoft Copilot Studio web app or by exploring the home page within the Teams app.
The home page provides an overview of all your copilots, allowing you to create new copilots, view recent copilots, and access learning resources such as videos, documentation, and learning paths. You can also navigate to the Copilots page to view all copilots created within a given environment, along with metadata such as owner, last published date, and last modified date.
Creating Your First Copilot
To create your first copilot, navigate to the Microsoft Copilot Studio introduction website using a supported browser such as Microsoft Edge, Chrome, or Firefox. Select the “Try free” button and sign in with your work email address. Start here.
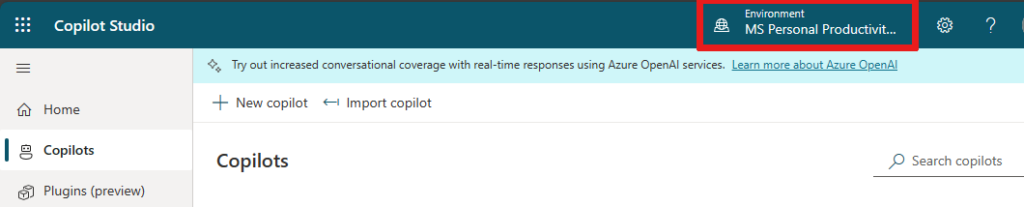
Note that personal Microsoft accounts are not currently supported. After signing up, a default Power Apps environment will be created for you. For most users, this default environment is sufficient. However, if you need to specify a custom Power Apps environment, you can do so using the environment picker.
Once you’ve signed up and selected your environment, you’ll be taken to the Home page. From here, select “Create a copilot” to begin the wizard. You’ll be prompted to give your copilot a name and select the language you want your copilot to speak. You can also choose to boost conversations with AI-generated responses by adding a URL to the appropriate field.
If you want to make customizations and enhancements before finalizing your copilot, select “Edit advanced options” at the bottom of the page. Here, you can choose a copilot icon to give your copilot a personality and represent your business scenario. You can also select prepopulated Lesson topics to provide starter content and familiarize yourself with copilot topics.
Once you’ve made your selections, select “Create” to create your copilot. Note that creating your first copilot in a new environment can take up to 15 minutes, with additional copilots being created faster. Once your copilot is created, you’ll be redirected to the copilot’s Overview page.
Here are the steps to create your first copilot with Microsoft Copilot Studio:
- Navigate to the Microsoft Copilot Studio introduction website using a supported browser such as Microsoft Edge, Chrome, or Firefox.
- Select the “Try free” button and sign in with your work email address. Note that personal Microsoft accounts are not currently supported.
- After signing up, a default Power Apps environment will be created for you. If you need to specify a custom Power Apps environment, you can do so using the environment picker.
- Once you’ve signed up and selected your environment, you’ll be taken to the Home page. From here, select “Create a copilot” to begin the wizard.
- Give your copilot a name and select the language you want your copilot to speak. You can also choose to boost conversations with AI-generated responses by adding a URL to the appropriate field.
- If you want to make customizations and enhancements before finalizing your copilot, select “Edit advanced options” at the bottom of the page. Here, you can choose a copilot icon, select prepopulated Lesson topics, and make other advanced customizations.
- Once you’ve made your selections, select “Create” to create your copilot. Note that creating your first copilot in a new environment can take up to 15 minutes, with additional copilots being created faster.
- Once your copilot is created, you’ll be redirected to the copilot’s Overview page.
Exploring Copilot Studio
While your copilot is being created, you can take the time to explore the Copilot Studio user interface and familiarize yourself with its features. You can experiment with preloaded user topics and system topics, interact with your copilot using the Test copilot chat pane, and review key concepts to better understand the authoring process.
Creating Topics
With your new copilot, you can start creating topics. A topic is a dialog tree that describes how your copilot responds to a user’s question. To create a topic, navigate to the Topics page and select “Add” at the top of the page. From the Add menu, select “Topic” and then “From blank.”
Here, you can build your topic by giving it a name and configuring a trigger. Trigger phrases are examples of user questions or utterances that teach the copilot to respond when the questions or utterances are detected. You can add trigger phrases by selecting “Edit” under the Phrases section of the Trigger box.
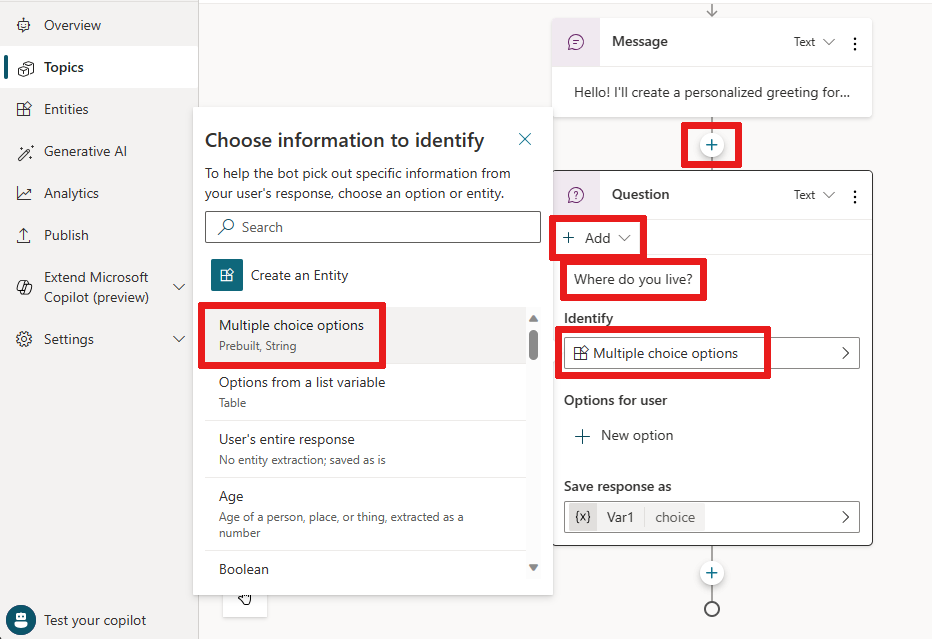
Once you’ve added your trigger phrases, you can begin building your dialog tree by adding nodes such as “Send a message” or “Ask a question.” You can also incorporate variables, entities, and Power Automate flows to create more complex dialog trees.
Here are the steps to create topics with your new copilot:
- Navigate to the Topics page and select “Add” at the top of the page.
- From the Add menu, select “Topic” and then “From blank.”
- Build your topic by giving it a name and configuring a trigger.
- Add trigger phrases by selecting “Edit” under the Phrases section of the Trigger box. Trigger phrases are examples of user questions or utterances that teach the copilot to respond when the questions or utterances are detected.
- Begin building your dialog tree by adding nodes such as “Send a message” or “Ask a question.”
- Incorporate variables, entities, and Power Automate flows to create more complex dialog trees.
Testing Your Content in Real-Time
With your content authored into a dialog tree, you can test the conversation in real-time to see if it’s working as expected. To do this, use the Test your copilot pane. If the pane isn’t visible on your screen, select “Test your copilot” at the bottom of the navigation menu.
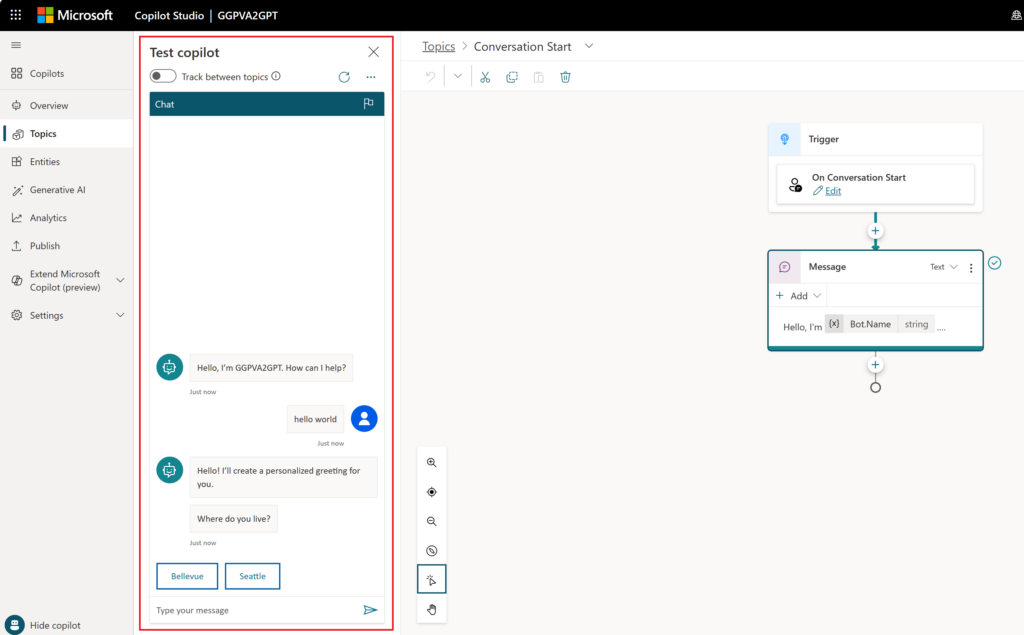
Turn on “Track between topics” at the top of the pane to follow along with the copilot as it executes your dialog. You’ll see parts of the dialog tree highlighted as the copilot moves through the conversation, allowing you to see how your content is being interpreted and delivered to the user.
You can interact with the copilot by typing messages into the chat window, just as an end-user would. This allows you to test the flow of the conversation and see how the copilot responds to different inputs. If you notice any issues or areas for improvement, you can make changes to your content and test again in real-time.
By testing your content in real-time, you can ensure that your copilot is delivering the best possible experience to your users. This iterative process allows you to fine-tune your content and make any necessary adjustments before publishing your copilot.
Here are the steps to test your content in real-time with the Test your copilot pane:
- Use the Test your copilot pane to test the conversation in real-time. If the pane isn’t visible on your screen, select “Test your copilot” at the bottom of the navigation menu.
- Turn on “Track between topics” at the top of the pane to follow along with the copilot as it executes your dialog.
- Interact with the copilot by typing messages into the chat window, just as an end-user would.
- Observe how the copilot responds to different inputs and make changes to your content if necessary.
- Test again in real-time to ensure that your copilot is delivering the best possible experience to your users.
- Repeat the process of testing and making changes until you are satisfied with the performance of your copilot.
Publishing and Analyzing Your Copilot
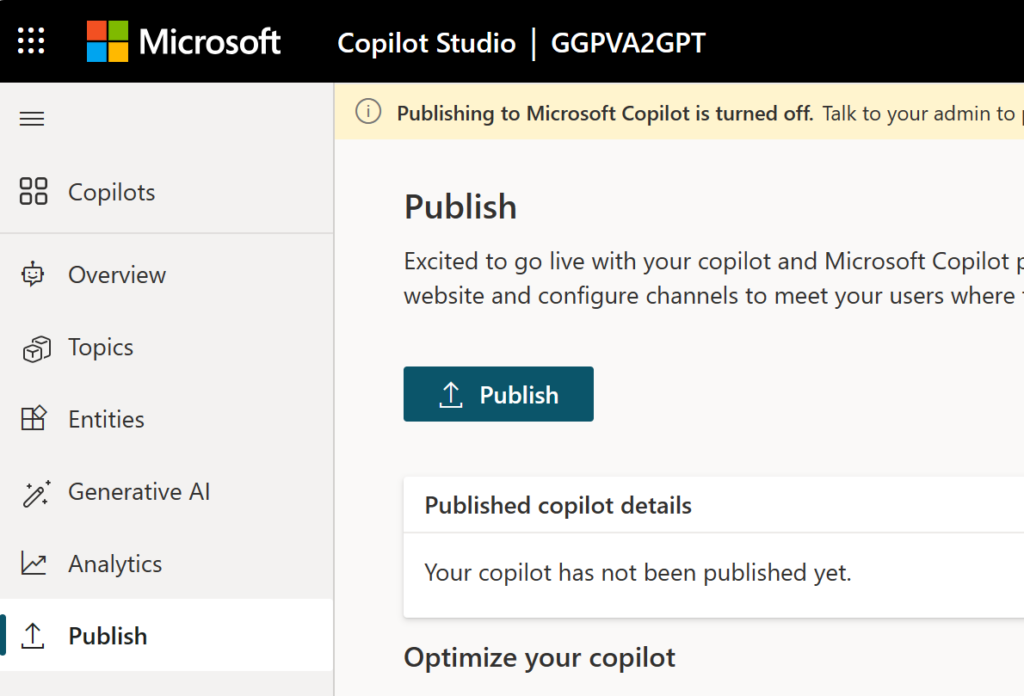
Once you’re satisfied with the content you’ve authored in your copilot, you can publish it to a website. To do this, navigate to the Publish page in the navigation menu and select “Publish” to activate your copilot. If the publish is successful, you’ll see a green banner at the top of the page.
You can then select the demo website link under “Share your copilot” to see your copilot in action on a demo website. This webpage demonstrates what your copilot will look like to an end-user visiting your webpage. You can interact with the copilot by typing into the chat window or selecting a starter phrase from the provided options.
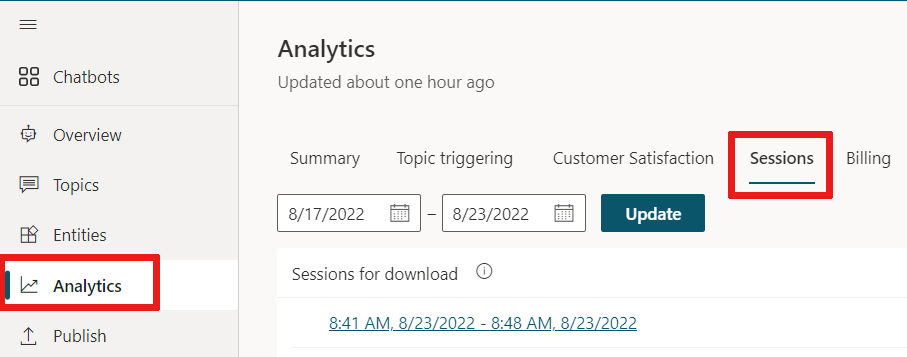
After your copilot has completed interactions with users, you can analyze its performance using the analytics provided within Copilot Studio. To view analytics, select “Analytics” from the navigation menu. Here, you’ll find key performance indicators (KPIs) such as the volume of sessions handled by your copilot, its effectiveness in engaging end-users and resolving issues, escalation rates to human agents, and abandonment rates during conversations. You can also view customer satisfaction information at the KPI level and in the Customer Satisfaction tab.
In addition to KPIs, you can view detailed session history and transcripts by selecting “Analytics” > “Sessions.” From here, you can download a CSV file containing the full session transcript. This information can be used to tune the performance of your copilot and make changes to the content in your topics to improve its efficiency.
Troubleshooting Common Issues
Addressing Permissions Errors
If you encounter a permissions error, create a new environment and attempt to create your copilot again. For further troubleshooting, refer to the Error Codes section in the Copilot Studio documentation. This section provides detailed information on common error codes and their potential causes, as well as suggested solutions for resolving the issue. By following the recommended steps, you can quickly and easily address permissions errors and get your copilot up and running again.
Troubleshooting PC Issues
If you are experiencing issues with your PC, there are several steps you can take to diagnose and fix the problem. First, determine if the issue is hardware or software related. Then, try to resolve common issues such as startup errors, shutdown problems, improper system settings, and malware. You can also perform maintenance techniques to help protect and improve the performance of storage drives, and address problems with devices like printers and monitors. 1
Troubleshooting Network Issues
If you are experiencing network issues, there are several tools and techniques you can use to troubleshoot the problem. Start by triaging the network problem and identifying basic TCP/IP issues and causes. Then, try to resolve common home networking and wireless issues, as well as issues with corporate wireless networks and Wi-Fi interference. You can also troubleshoot VPN errors and fix common problems with routing, switching, and firewalls. 2
Troubleshooting Customer Service Issues
If you are experiencing customer service issues, it is important to have the skills to handle a variety of different problems. Start by effectively dealing with the issue while maintaining a positive relationship with your customers. You can also identify and resolve larger systemic issues within your company to prevent similar problems from occurring in the future. 3
Troubleshooting Office 365 Issues
If your users are experiencing issues with Office 365, there are several steps you can take to troubleshoot the problem. Start by addressing common end-user troubleshooting requests such as printing, version compatibility, and startup issues. You can also fix common audio and video issues in Teams, reset OneNote notebooks that won’t sync, and connect to different mailboxes in Outlook. Additionally, you can find solutions to common problems with Access, Excel, PowerPoint, Visio, SharePoint, Teams, Publisher, and OneDrive. 4
Troubleshooting Exchange Online Issues
If you are experiencing issues with Microsoft Exchange Online, there are several common problems you may encounter and steps you can take to resolve them. Start by identifying the cause of the issue and then follow the recommended steps to fix the problem. 5
Troubleshooting Wireless Networking Issues
If you are experiencing issues with your wireless network, there are several steps you can take to troubleshoot the problem. Start by identifying common troubleshooting tools and using them to solve client connectivity problems. You can also properly secure your Wi-Fi network, track down causes of wireless network interference, and address hardware problems, security issues, and misconfigurations. 6
Tips and Tricks for Effective Copilot Creation
- Start with Simple Objectives: Begin your journey by targeting simple tasks for your copilot to manage.
- Experiment with Built-in Content: Utilize the preauthored conversations and topics to build engaging interactions.
- Understand Your Audience: Customize your copilot’s language and responses based on your target audience.
- Regularly Update and Refine: Continuously improve your copilot based on user feedback and analytics.
- Leverage Microsoft’s Resources: Make the most out of the extensive training and support resources provided by Microsoft.
- Stay Informed on Updates: Keep up with the latest updates and features introduced in Copilot Studio to enhance your copilot’s capabilities.
Interesting Facts About Microsoft Copilot Studio
- AI Integration: Copilot Studio is at the forefront of integrating generative AI, offering unprecedented capabilities in virtual assistance.
- Language Diversity: It supports multiple languages, broadening the scope of interaction and inclusivity.
- Seamless Transition: The transition from Power Virtual Agents to Copilot Studio represents Microsoft’s commitment to evolving AI technology.
- User-Friendly Interface: Designed for ease of use, it allows users without technical expertise to create effective AI copilots.
- Versatility in Deployment: Copilots can be created and managed both via the web app and within Microsoft Teams, ensuring flexibility in various organizational settings.
Conclusion
Microsoft Copilot Studio is a testament to the advancements in AI and its practical applications in business environments. By following this guide, you can embark on creating your first AI copilot, harnessing the power of Microsoft’s innovative technology to enhance customer interactions and streamline operations. With ongoing updates and a growing community of users, Copilot Studio is poised to become an indispensable tool in the arsenal of modern businesses. Read more from Microsoft here: Official Microsoft Copilot Studio documentation – Microsoft Copilot Studio | Microsoft Learn